
7 Mistakes You Might be Making with Acoustic Drywall (and How to Fix Them)
- Jason Wright
- Dec 16, 2025
- 4 min read

Transform your basement suite renovation or home office installation into a soundproof sanctuary. Acoustic drywall delivers exceptional noise control, but common installation mistakes can destroy its effectiveness entirely. Discover the seven critical errors that sabotage your acoustic performance and learn professional-grade solutions that guarantee results.
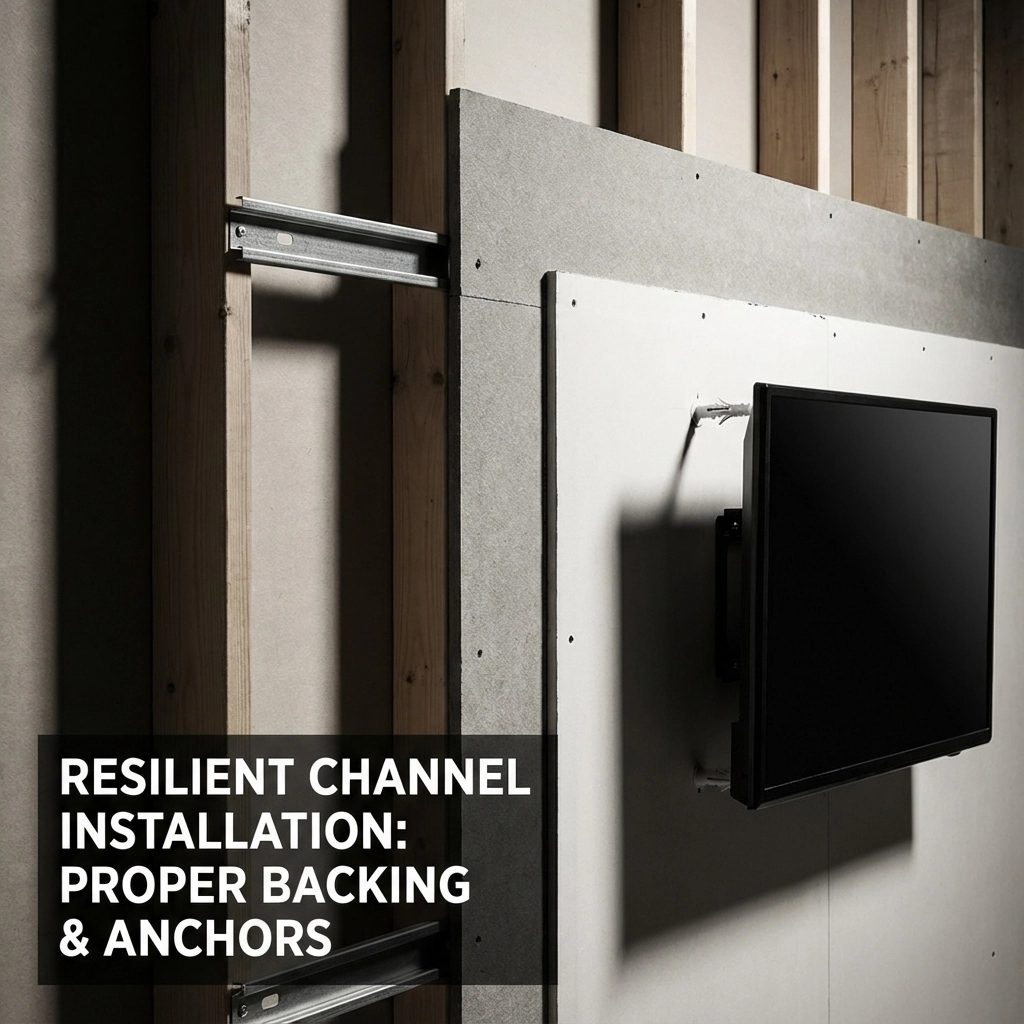
Mistake #1: Mounting Heavy Objects Directly on Resilient-Channel Walls
Stop drilling into your acoustic investment. Resilient channel systems create sound isolation by decoupling drywall from wall studs, but mounting TVs, floating shelves, or built-in desks directly into the framing creates rigid sound bridges that eliminate acoustic benefits completely.
The Professional Fix
Plan your basement suite layout during the design phase. Install backing boards behind the drywall specifically for mounting purposes, or use heavy-duty drywall anchors that distribute weight across the surface. For home office installations requiring multiple monitors or storage systems, create dedicated mounting zones with proper backing before hanging acoustic drywall.
Experience the difference proper planning makes. Your acoustic system maintains its integrity while supporting all necessary fixtures and furniture.
Mistake #2: Installing Resilient Channel Incorrectly
Eliminate installation errors that waste your investment. Poor resilient-channel installation: wrong spacing, upside-down orientation, improper splices, or misaligned notches: creates sound bridges that transfer vibration directly through your walls, leaving your basement suite no quieter than standard construction.
The Professional Fix
Verify correct orientation before fastening any channels. Ensure notches don't land over studs and maintain proper 16-inch or 24-inch spacing throughout. Require detailed installation drawings and conduct quality-control inspections at each phase. Train your installation crew on proper techniques or hire certified acoustic specialists for critical areas like home office walls adjacent to living spaces.
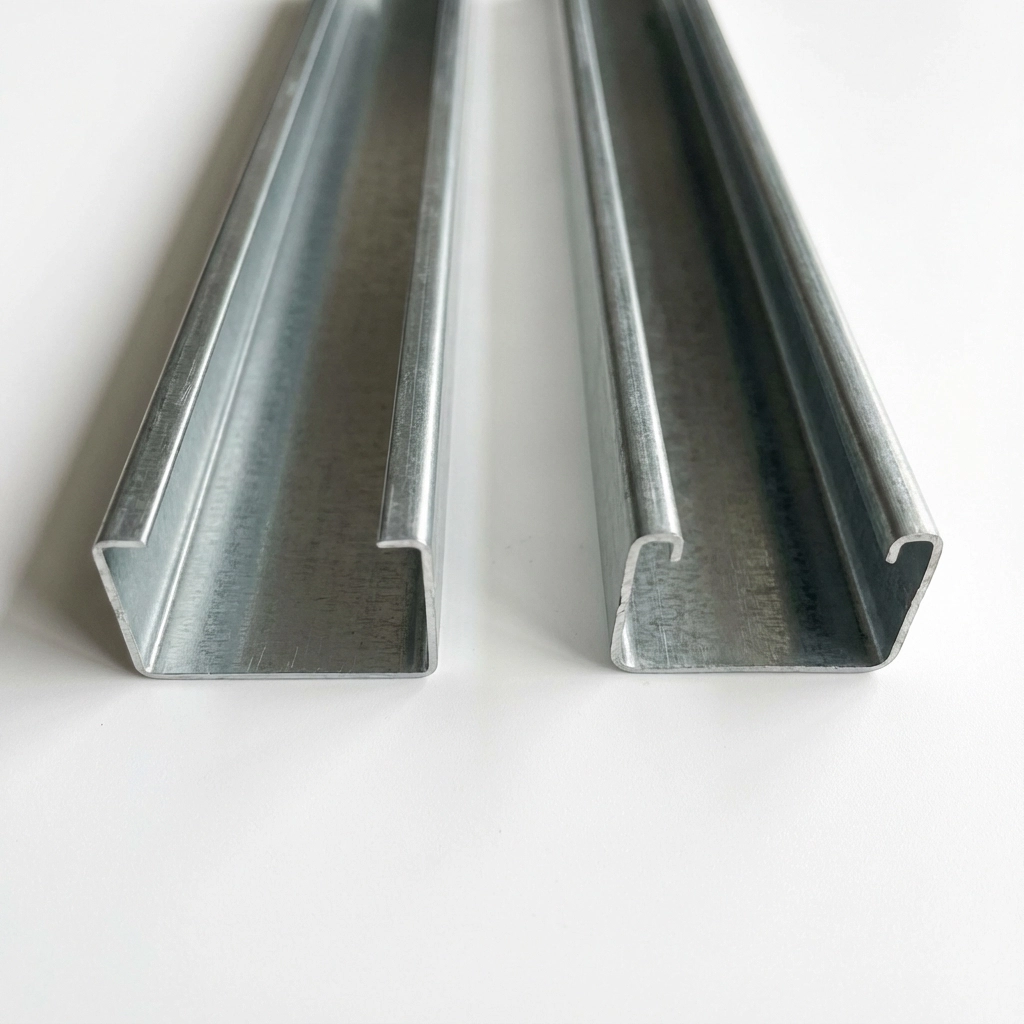
Mistake #3: Confusing Hat Channel with Resilient Channel
Recognize the difference between similar-looking products. Hat channel and resilient channel appear nearly identical but perform vastly differently. Hat channel touches studs at two points, allowing vibration transfer, while resilient channel's single-leg connection provides true acoustic isolation for your basement renovation.
The Professional Fix
Specify "resilient channel" clearly in all project documentation rather than generic terms like "furring channel." Physically inspect deliveries to verify the correct product arrives on-site. Look for the distinctive single-leg design that creates the necessary isolation gap between drywall and framing.
Mistake #4: Hanging Drywall with Poor Orientation
Master basic installation fundamentals that impact acoustic performance. Installing drywall upside down or with incorrect paper orientation compromises both surface quality and sound absorption characteristics, creating finishing problems that reduce your acoustic investment's effectiveness.
The Professional Fix
Position the paper side outward on all acoustic drywall installations. This orientation provides the smooth surface necessary for proper finishing while maintaining optimal acoustic properties. For basement suite applications, this attention to detail ensures consistent performance across all living areas.
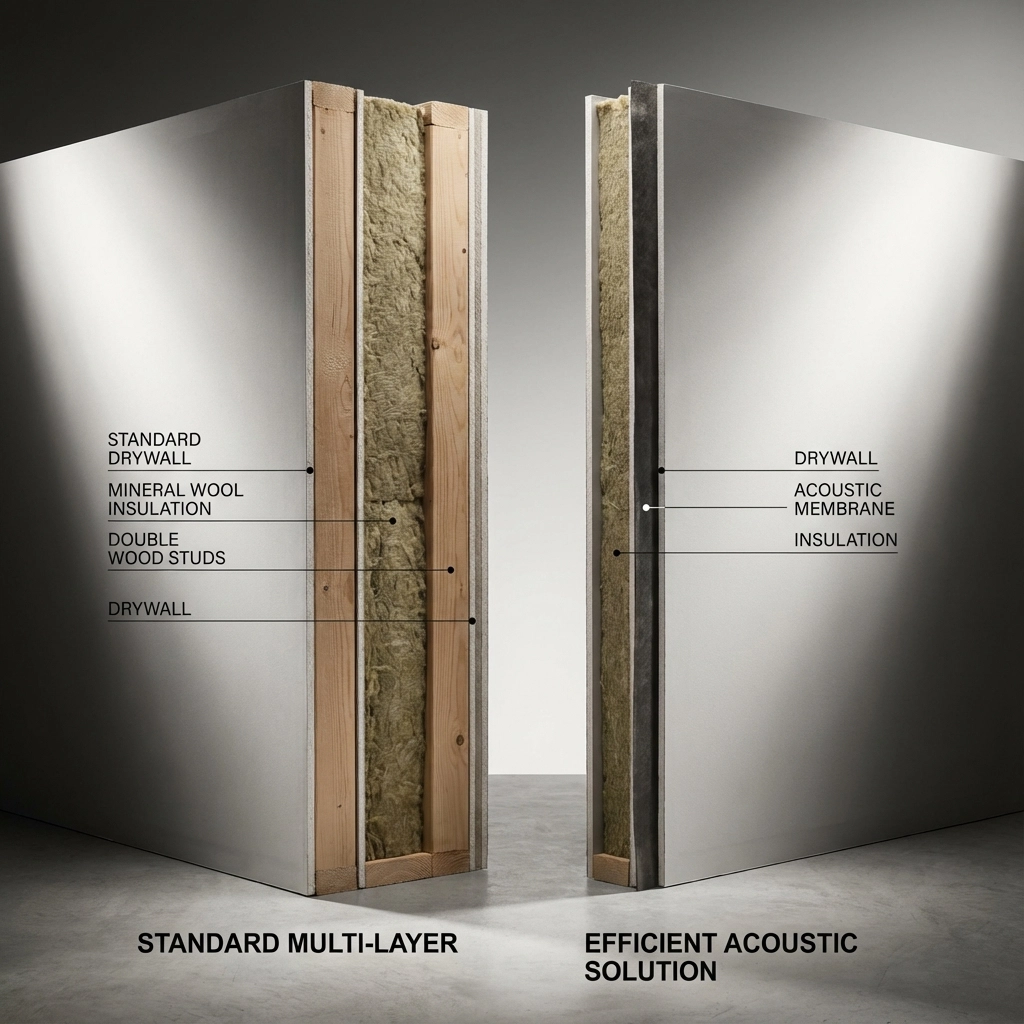
Mistake #5: Over-Relying on Multiple Drywall Layers
Stop wasting money on ineffective thickness strategies. Adding multiple standard drywall layers provides minimal acoustic improvement while significantly increasing material costs and installation time. This approach delivers poor value compared to specialized acoustic solutions for basement suites and home offices.
The Professional Fix
Invest in purpose-built acoustic products instead of excessive drywall layers. Use damping compounds, sound-dampening membranes, or isolation clips that deliver superior performance with less bulk. Reserve multiple layers primarily for fire protection requirements rather than acoustic goals.
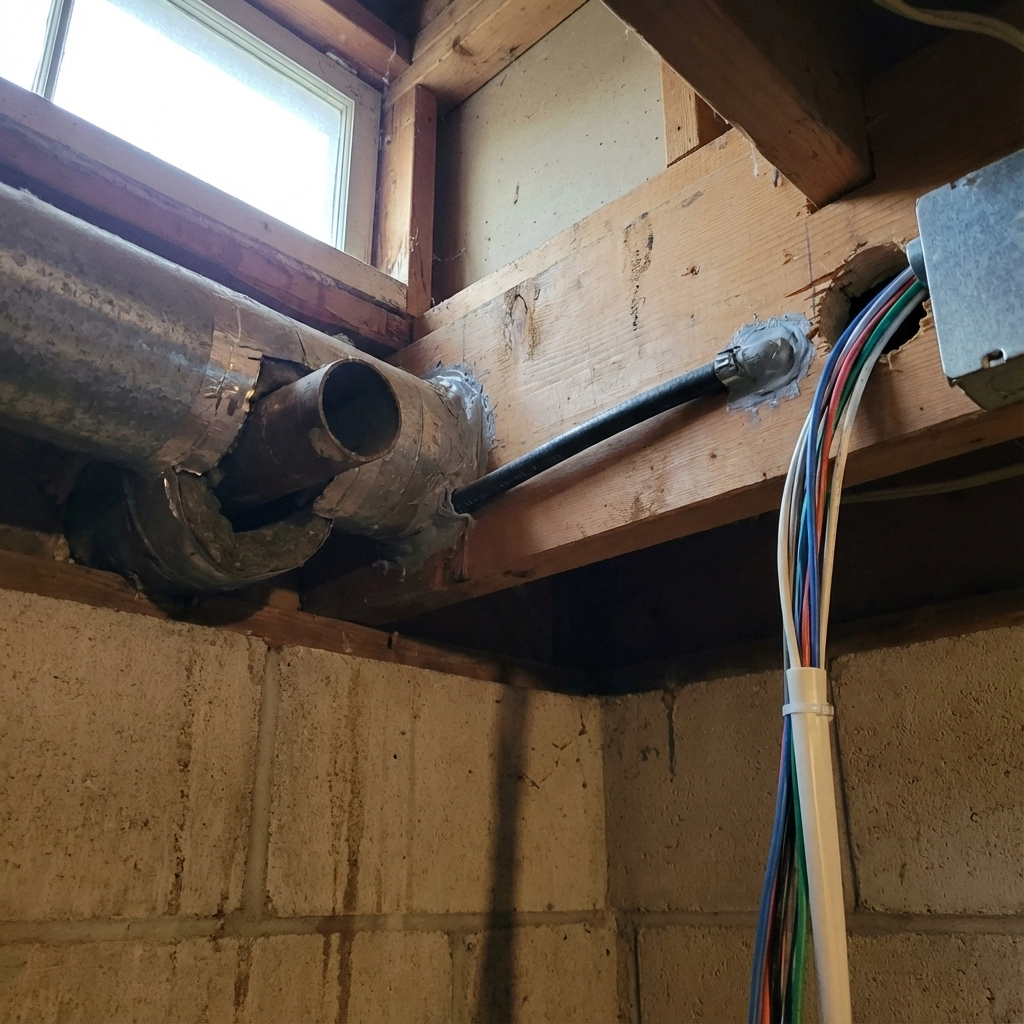
Mistake #6: Ignoring Flanking Paths
Seal every sound leak that bypasses your acoustic barriers. Noise travels through gaps around electrical outlets, doorways, ductwork, and ceiling penetrations, reducing even high-performance wall systems to ineffective barriers. Basement suites with multiple utility penetrations are particularly vulnerable to flanking path failures.
The Professional Fix
Address every potential sound pathway systematically. Install back-to-back electrical outlets in separate stud cavities, seal all ductwork penetrations with acoustic sleeves, and use solid-core doors with proper acoustic sealing strips. For home office installations, pay special attention to cable management openings and HVAC connections that can create hidden sound bridges.
Mistake #7: Skipping Critical Sealing Steps
Complete your acoustic system with comprehensive sealing. Many installations fail because builders skip the final sealing phase, leaving air gaps that transmit sound around expensive acoustic assemblies. This oversight can reduce wall performance by 50% or more.
The Professional Fix
Apply acoustic caulk to every gap, joint, and penetration before finishing work begins. Focus on perimeter sealing where walls meet ceilings, floors, and adjacent walls. Use specialized acoustic sealants that maintain flexibility and won't crack over time, ensuring long-term performance in your basement suite or home office.
Building Acoustic Excellence in Your Space
Create superior soundproofing through integrated design strategies. Effective acoustic drywall performance requires combining proper product selection, correct installation techniques, comprehensive sealing, and attention to flanking paths. Rather than relying on single solutions, develop layered approaches that address multiple aspects of sound transmission.
Start your basement suite renovation with acoustic planning from day one. Consider how each room will be used, what noise levels you need to control, and where sound isolation matters most. Home office installations benefit from quiet boundaries that separate work areas from family activities, while basement suites require isolation from overhead footfall and mechanical systems.
Experience the difference professional acoustic design makes in your finished space. Proper acoustic drywall installation creates the quiet, comfortable environment that transforms basement areas into valuable living spaces and productive work environments.
Professional Installation Makes the Difference
Achieve acoustic goals through expert installation and quality materials. These seven mistakes represent the most common failures in acoustic drywall projects, but avoiding them requires understanding both the products and proper installation techniques.
Invest in professional consultation for complex acoustic challenges or critical installations. The cost of expert guidance typically pays for itself through improved performance and avoided mistakes that would require expensive corrections later.
Ready to transform your basement suite or home office with professional acoustic solutions? Discover our specialized drywall and acoustic installation services designed specifically for residential renovations and restoration projects. Contact us for a consultation that ensures your acoustic investment delivers the quiet, comfortable space you envision.
Comments