
Rhythm of the Trade #3: Feathering Edges = Pressure Control (The Invisible Blend)
- Jason Wright
- Feb 28
- 4 min read

Updated: Mar 1
The rhythm: Start firm. Release slow. Feel when you're close enough to stop.
Feathering isn't a tool choice. It's not the size of your knife or the brand of mud you load. Feathering is pressure: modulated, deliberate, and controlled across every inch of an edge. The goal is invisible. No ridge. No transition line. No thickness jump that catches light or shadow. Just a perfectly flat blend that disappears into the wall.
Get the pressure wrong, and you'll spend hours sanding down hard edges. Get it right, and the repair becomes undetectable before primer touches the surface.
The Process: Pressure as the Variable
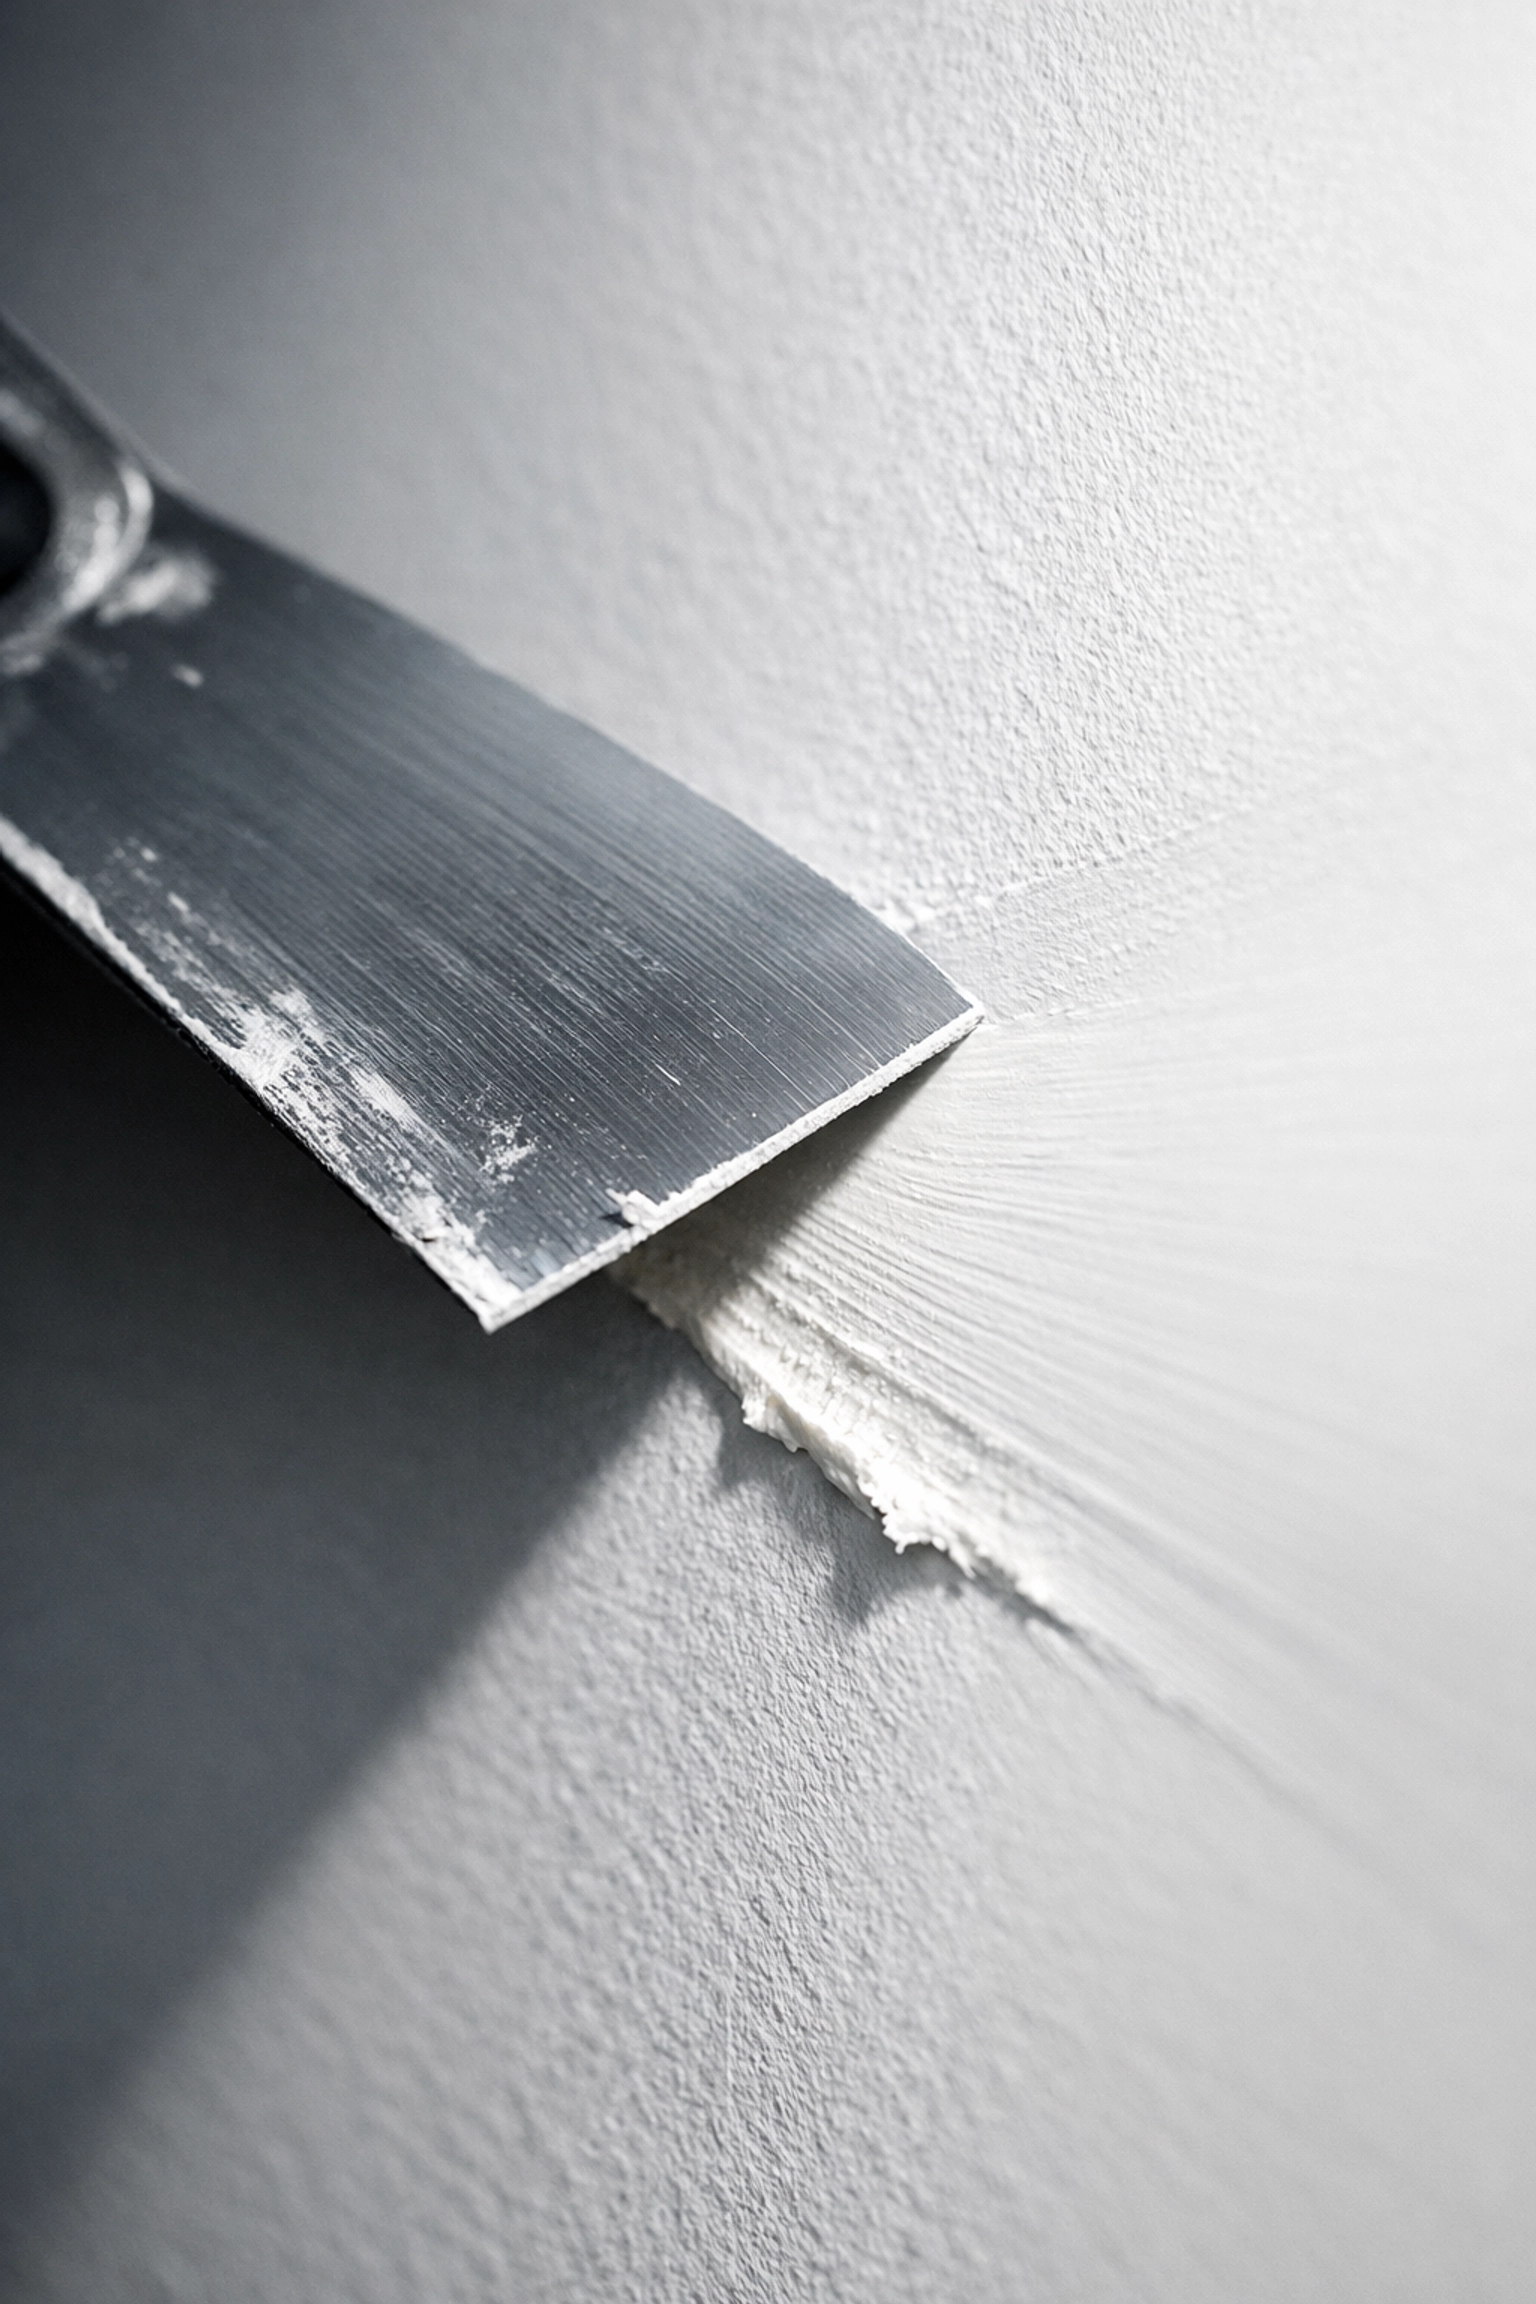
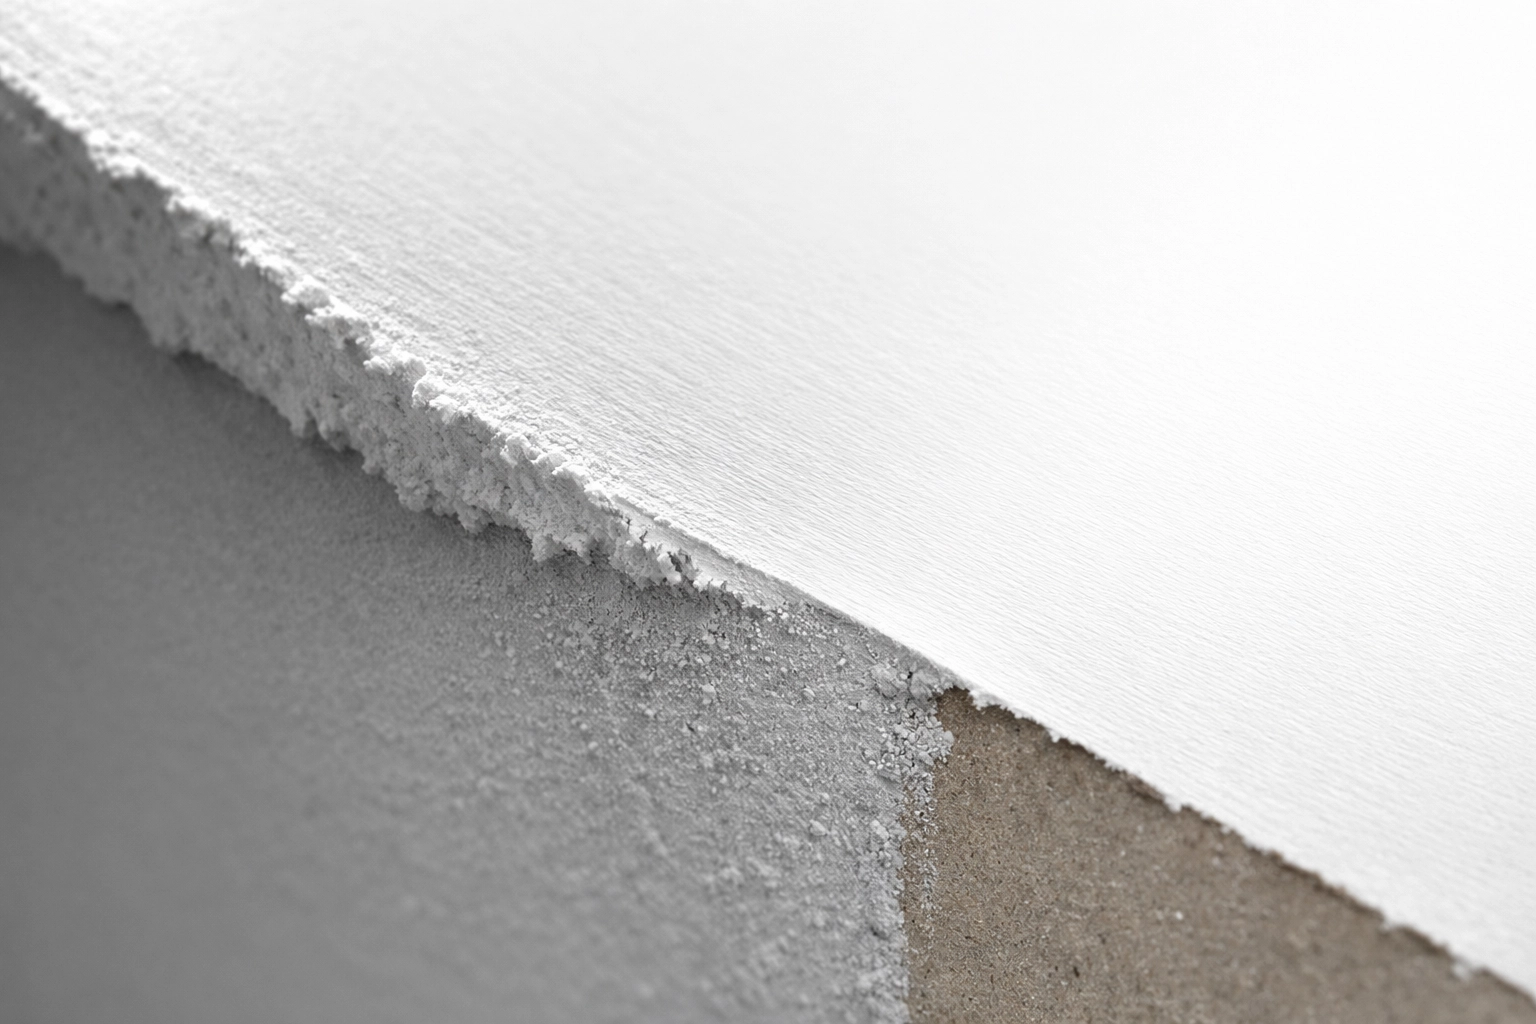
Feathering starts where the patch or skim coat ends. The material is thickest at the center: full coverage, full build. As your blade moves outward toward untouched surface, pressure increases and material thickness decreases. The edge tapers. The transition zone stretches wider. By the time your knife reaches clean drywall, there's nothing left but a whisper-thin film.
This is where control separates amateurs from professionals. Too much pressure too early creates divots and scrapes. Too little pressure leaves a ridge: a visible step that no amount of sanding will fully erase. The correct rhythm requires three things: consistent angle, graduated force, and the ability to read feedback through the blade.
Start your pass with moderate pressure. Keep your knife at a shallow angle: 15 to 20 degrees. As you move away from the fill zone, increase pressure incrementally. Feel the blade flex. Listen for the scrape. When resistance drops and the blade glides smooth, you're feathered. Stop there. One more pass risks cutting through and exposing the substrate.
Why This Rhythm Matters: The Quality Payoff
Proper feathering eliminates three costly problems. First, it reduces sanding time. Hard edges require aggressive sanding, which creates dust, eats through paper face, and extends timelines. Feathered edges need only a light pole-sander pass to smooth texture: minutes instead of hours.
Second, it prevents call-backs. Visible transitions show up under angled light, especially in basements with pot lights or offices with directional task lighting. Clients notice. Inspectors notice. A feathered edge that's invisible at rough-in stays invisible after two coats of paint.
Third, it preserves surface integrity. Over-sanding to correct poor feathering damages drywall paper, raising fibers and creating "fuzzies" that telegraph through finish coats. Feathering with pressure control protects the substrate. The wall stays flat. The finish stays smooth.
This is where durability meets aesthetics. Flatter walls. Tighter blends. Fewer fixes down the line.
What Homeowners Should Watch For
If you're hiring for a basement suite renovation, heritage restoration, or home office buildout, pay attention during walk-throughs. Run your hand across patched areas before paint. You should feel nothing: no bump, no dip, no texture change. If your fingers detect a ridge, the feathering wasn't controlled.
Check walls under raking light. Use a flashlight held parallel to the surface. Properly feathered repairs disappear. Poorly feathered repairs cast shadows: slight, but visible. This is especially critical in office spaces where large windows or desk lamps create constant angled light.
Ask about sanding dust volume. Excessive dust suggests the crew is correcting hard edges after the fact instead of feathering correctly during application. Controlled feathering reduces sanding. Less dust means better pressure control was applied upfront.
Finally, look at corner transitions and ceiling joints. These high-visibility areas reveal skill level immediately. Smooth, invisible blends indicate a crew that understands pressure modulation. Visible seams or texture mismatches indicate rushed work without proper edge control.
Where This Shows Up
Feathering is non-negotiable in three common scenarios:
Basement Suites: Patch work around new electrical boxes, HVAC vents, and window cuts requires invisible blending. Basements often have lower light, but close-quarters living means walls are scrutinized daily. Every patch must disappear.
Heritage Restorations: Matching existing plaster texture or repairing cracks in older homes demands flawless feathering. Historical properties often have uneven substrates. Pressure control becomes the bridge between old and new, preserving character while ensuring structural soundness.
Home Offices: Professional spaces require Level 4 or Level 5 finishes. Video calls, task lighting, and natural window light expose every imperfection. Feathering edges to invisibility isn't optional: it's the baseline for a credible workspace.
In all three environments, the rhythm is identical: firm start, graduated release, stop when smooth.
Quick Checklist: Feathering Edge Control
Use this checklist to verify proper feathering technique on your project:
Before Application:
Mud consistency is smooth: not too dry, not too soupy
Knife or trowel is clean and free of dried material
Ambient temperature allows proper set time (avoid extreme heat or cold)
During Application:
Blade angle stays shallow (15–20 degrees)
Pressure increases gradually as knife moves outward
Final pass leaves no detectable ridge when touched
Feathered zone extends 4–6 inches beyond fill area
After Application:
Surface feels flat to the hand: no bumps or steps
Raking light reveals no shadows or transitions
Minimal sanding required (light pole-sander pass only)
No paper damage or fuzzing from over-sanding
Final Verification:
Patch is invisible after primer coat
No texture mismatch under angled light
Client walk-through confirms seamless blend
The Invisible Standard
Feathering separates competent drywall work from forgettable repairs. It's the rhythm that doesn't announce itself: the skill that becomes invisible precisely because it was executed correctly. Pressure control isn't dramatic. It's disciplined. It's repeatable. And it's the foundation of every flat wall we deliver.
If you want it done right: walls that disappear into the background while your space takes center stage: book a consultation or explore our drywall finishing services. We don't rush. We feather. Every edge. Every time.
Perpendicular Wall and Ceiling www.perpendicularwallandceiling.ca
Comments